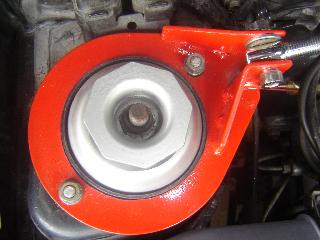
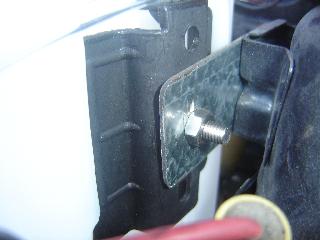
Left mount in position. The central hole needs
the paint removed to fit correctly.
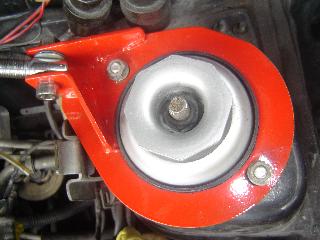
Right Mount in position.
SA413
Strut Tower Brace
How to build a brace for less than A$100
After some searching I had not been able to find a tower brace for the MK1 SA413. They are available for the later SF413 but the MK2/3 strut mount uses 3 bolts, whereas the MK1 only uses 2 bolts to locate the top of the suspension strut. A suitable bar would be the same shape as the MK2/3. It has to rise off the strut mount to clear the inlet manifold or use an elevated mount on the top plate with a straight bar between the two tower mounts. Looking at pictures of GTi's fitted with the strut bar, the all-out competition bars seem to use the elevated mount / straight bar setup while the more cosmetic setups use the low mount and bent end bars. For my purposes, either type would suit as it is a purely cosmetic installation (but it must still perform its intended function of supporting the top of the suspension tower). Using a MK2/3 bar is an option if new holes are drilled in the correct locations. However .......
Where I bought the
bar:
Looking on
E-bay, the Nissan Skyline R33 bar looked to be the correct setup
- the bolt holes for the mount were in the correct location,
(necessary as I was unsure if the mount could be drilled to
relocate the mount holes) and the bar was of the bent style, low
mount type. Prices ranged from very low to A$189. As I had no
idea if this would work, I bid on a unit that had a steel base
mount and alloy bar between the mounts. The bar I used is a fully
adjustable Nissan Skyline R33 Strut Brace bought off
Ebay from
Flying-Performane for A$26 plus A$25 freight. It
is an actuion so prices will vary and there are other
types/styles from other sellers.
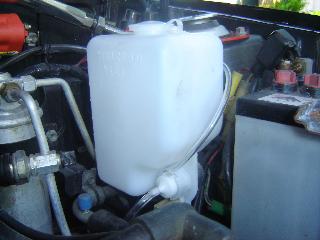
Fitting the bar:
The top plates need a
little work before they fit. The inner hole in the strut bracket
that goes over the top of the suspention tower is a little tight.
I cleaned off the paint on the bracket and it dropped into
position. The bolt holes line up perfectly and the existing top
mount bolts and nuts will tension down.
|
Left mount in position. The central hole needs the paint removed to fit correctly. |
Right Mount in position. |
The most interesting thing about using this bar is the the Suzuki top strut mounts are actually further apart than the Nissan. The bracing bar is short by about 20mm. This was easily fixed by lenghting one of the screw-in adusters. The left side adjuster is Left Hand Thread so the right side is the easiest to make longer. In the photos, I have a temporary fix by just welding a little extra threaded bar to the existing adjuster. The better way would be to remove all the threaded section from the adjuster, measure the length of the new section and weld that to the existing adjuster head. A 100x14x1.5mm bolt will be long enough to cut to exact length. Allow for at least 15mm of thread into the alloy bar.
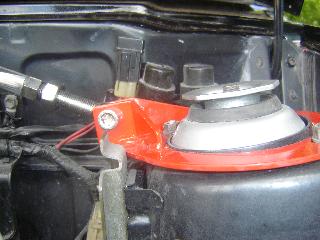 Threaded bar extended to make the Nissan bar fit the Suzuki |
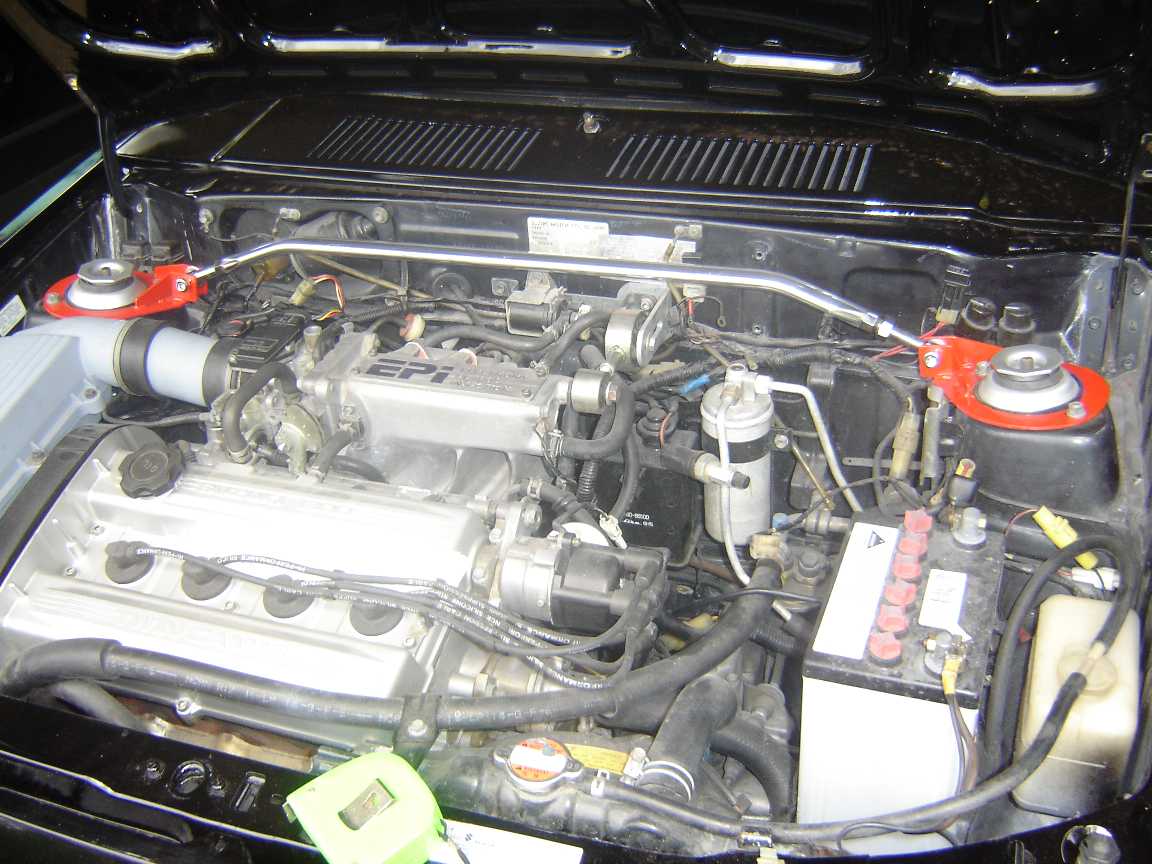 View of the completed bar - click on image for a more detailed view |
Adjusting the bar:
The adjusters
are left and right hand threads so will lenghten or shorten as
the bar is rotated on the threaded adjusters. Start with the top
of the bar facing the firewall. Adjust the threaded ends so bar
is the correct length and the adjusters can be bolted to the
strut brackets. Tighten the Allen headed bolts so the bar can
move but there is no slack between the adjusters and the top
mount. Turn the bar towards the front of the car to load up the
mounts. When the bar is at the angle you want (it might be hard
turning the bar so the flat surface faces up), lock the lock nuts
on the adjusters and lock the Allen headed bolts on the top
plate. If you adjust it correctly, there will be pre-load on the
bar and strut tops. How much you load up the strut tops is up to
you.
Problems and fixes:
 |
 |
Last word:
It took longer to to
sort out making the adjuster longer by 20mm than installing the
mounting plates. This bar can also be adapted for the Swift MK1
and Barina MK1 SOHC cars. In the case of the Swift / Barina, the
air cleaner will have to be replaced as the housing obstructs the
clear line for the bar from left to right across the engine bay.
 |
A shot across the Suzuki GTi MK1 engine bay with the bar installed and tightened showing the low mounts and bent bar ends. Neat, and clears everything. Total cost was A$55. |
BACK
John Miller - RedlineGTi.com
member
Written by a Weasel: This site is for my own entertainment - What you read is what you get. As always, articles are for information only - use of this information is entirely the responsibility of the reader. These articles should not be substituted for specific professional advice. Names and logos remain the property of thier respective owners.
Last updated: 01/02/2005
Visitors to this
page:
Free Counter
supplied by http://www.digits.com/