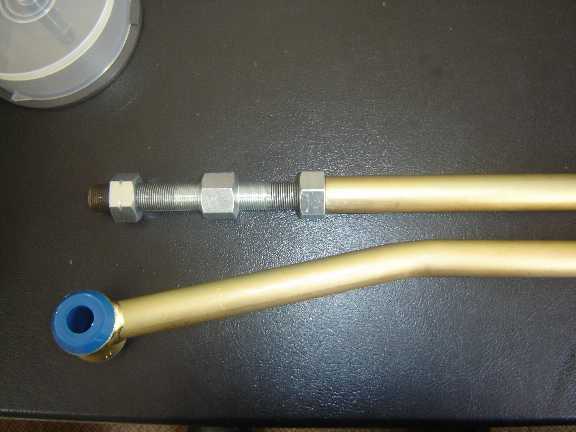
Photo 1: Noltec adjustable panhard rod for VB - VS Commodore and Gemeni
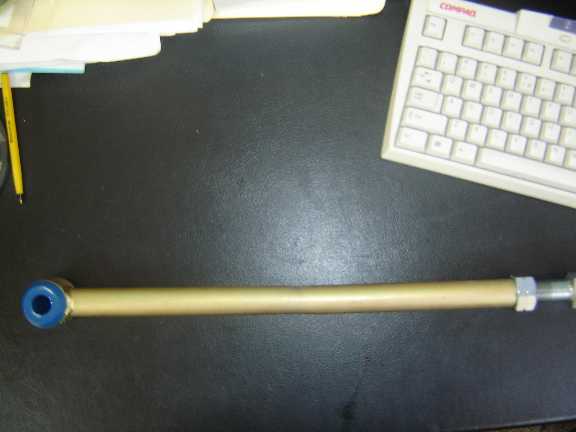
Photo 2: Bend is not required on Suzuki GTi so it can be straightened
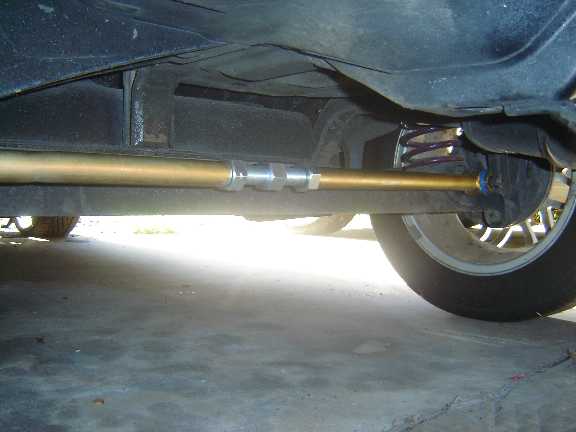
Photo 3: Adjustable panhard rod installed on 1986 MK1 GTi SA413
Adjustable Panhard Rod for Suzuki SA413 GTi MK1 (1986 - 1988)
When lowering springs are installed, the geometry of the rear end changes - the lower the suspension is set, the further to one side the axle assembly moves. The wheels will end up off centre with some fairly interesting handling effects and one tyre fouling the body. I had a tyre to inner wheel-arch gap of 50mm on the RHS and 35mm on the LHS - which would make the rear-end about 1/2" off centre.
The bar used here is a thick walled alloy bar designed for the Holden Commodore / Gemini by Noltec Suspension. A couple of small changes are required to use the bar on a GTi. The bend in the first image is to allow clearance for the big bore exhaust pipes on Commodores. The simple approach is to use the bar as-is, with the bend facing down (it would hit the body mount on the GTi if it faced up). As the shape of the bar has no effect on the performance, a bar adjusted to the correct length will locate the axle correctly. I chose to straighten the bar as it will look better when installed. A press was used to re-form the bar so it looks like photo 2 - this is a purely cosmetic change. The bar was only supplied with 1 crush sleeve so I removed 1 from the original Suzuki bar (these are for the bolts to go through in the blue Poly bushes). I also used larger OD flat washers on the bolts against the bushes and Nylock nuts on the mounting bolts.
Installing Panhard
Rod on a Suzuki Swift GTi SA413:
All fitting is carried out with the car on its wheels in
a normal static position - half a tank of fuel and the weight of
the driver in the drivers seat.
Fitting the bar is straightforward. Remove the existing panhard bar from the car. Adjust the new bar to the approximate length of the Suzuki bar with the bars off the car. Centre the axle by placing 2 equal sized wooden blocks (about 40mm - but depends on width of wheels and rim offset) between the top of the tyre and the inner wheel-arch. Make sure the blocks are tight and measure the gap to be sure the wheels are centred in the wheel-arch. Fit the new panhard rod to the fixed body mount first, but don't tighten the mounting bolt yet. Adjust the bar length (with the centre adjuster) till the second mounting bolt slides (finger push) into the bush. Tighten both mounting bolts and lock the centre lock nuts. Remove the wooden blocks, bounce the rear end a couple of time to make sure everything still moves and recheck the wheels are centred. Test-drive the car and then re-check nothing binds. That's it - heavy-duty adjustable panhard rod installed!
Photo 1: Noltec adjustable panhard rod for VB - VS Commodore and Gemeni |
Photo 2: Bend is not required on Suzuki GTi so it can be straightened |
Photo 3: Adjustable panhard rod installed on 1986 MK1 GTi SA413 |
|
BACK
John Miller - RedlineGTi.com
member
Written by a Weasel: This site is for my own entertainment - What you read is what you get. As always, articles are for information only - use of this information is entirely the responsibility of the reader. These articles should not be substituted for specific professional advice. Names and logos remain the property of their respective owners.
Visitors to this
page:
Free Counter
supplied by http://www.digits.com/