 |
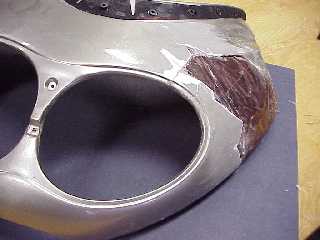
Look closely at the divider bar. I
repaired it by placing many strands, of 24 ounce,
lengthwise over (and beside) the crack. Use "30 Minute" epoxy glue, and small wooden sticks to place the glue and the strands. This repair is much stronger than the original part. Note also, the crack at the headlamp flange was glued, prior to clamping. Now I’ll build strands of 24 ounce across this crack. |
 |
With the headlamp area stabilized, I
leeched "30 Minute" epoxy into other cracks.
Use a heat gun to thin the epoxy, after it is applied. Do not try this method with "5 Minute" or "fast set" epoxy. |
 |
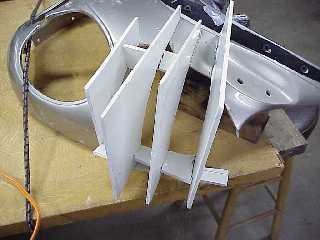
In order to build a temporary external
mold, it’s necessary to duplicate shapes. Use the less damaged side to make patterns from 1/4 " foam board. Scribe the shape with a compass, then cut out using a razor knife. |
 |
Begin the external mold by hot gluing
each rib, on the damaged side. Be sure to flip your rib
180° when gluing it in place.
You can save yourself some work, by avoiding a mistake I made. Put duct tape around the edges of the broken area, sticky side in, with about ¼-½" extending into the opening. You’ll see this method a few pages on. This technique will reduce the sanding, after removing the external mold (makes a prettier edge, also). |
 |
Continue the external mold build-up by
shaping and cutting additional ribs. Cut spacers, curved to match the other side, to stabilize the ribs. Save the pieces you cut out, they can be used for patterns to make finish measuring templates. |
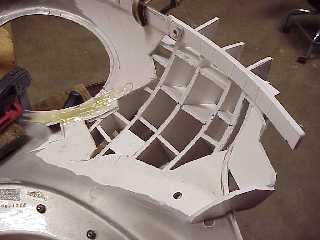 |
Here’s an inside view of the fully
built external mold frame. Black line shows were outside
duct tape should end (epoxy comes loose from the glue
side with no problem.) This curved piece will provide a positive location for the lower mounting flange. I used a piece of foam board, cut to a curve and anchored with a brace, to form the rear edge mold. Note the 24 ounce long strand crack repair. |
 |
Line the inside of the external frame
with masking tape, or duct tape, and waxed paper. Use
many layers of masking tape, to provide sufficient
stiffness. The epoxy resin will release from the glue side of tape. This photo shows the first two layers of ¾ ounce cloth, laid up with epoxy resin. |
 |
I added a layer of 24 ounce cloth, then
four more layers of ¾ ounce cloth. With the resin fully cured, the external mold can be removed and wax paper pulled away. The wrinkled finish is caused by the wax paper, which cannot stretch into a compound curve. Note that I used enough masking tape to keep the epoxy/fiberglass below final finish level. This is important because:
|